Is your sprinkler system feeling a little under the weather? Has it lost its vigor, leaving your lawn thirsty and parched? Fear not, for we have the solution to revive your beloved irrigation system. Just like a beating heart keeps us alive, water pressure is crucial for the proper functioning of your sprinklers. When that pressure drops, it’s time to roll up your sleeves and get to work.
In this article, we will uncover the reasons behind why your sprinkler system may have lost its pressure and provide you with practical solutions to bring it back to life. From checking for leaks or blockages in the system to examining the water source and pressure regulator, we will guide you step by step on how to diagnose and fix the issue.
So grab your tools and let’s dive into this troubleshooting adventure together!
Check for Leaks or Blockages in the System
Before you start troubleshooting, take a moment to check if there are any leaks or blockages in your sprinkler system that could be causing the loss of pressure. This is an important step to identify and resolve issues that may be affecting the performance of your system.
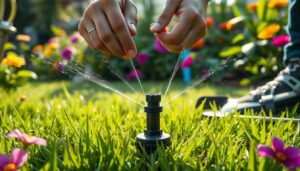
Start by visually inspecting all the sprinkler heads for signs of leakage. Look for puddles or wet spots around the base of each head, as well as any visible cracks or damage. Additionally, check if there are any obstructions such as dirt, debris, or rocks blocking the nozzles.
If you find any leaks or blockages, repair or clean them accordingly using appropriate troubleshooting techniques and maintenance tips.
Once you have addressed these issues, it’s time to inspect the water source and pressure regulator which will be discussed in the subsequent section about ‘inspect the water source and pressure regulator’.
Inspect the Water Source and Pressure Regulator
Check if the water source is flowing freely and if the pressure regulator is doing its job. To inspect the water source, follow these steps:
- Start by checking if there are any obstructions in the main water line leading to your sprinkler system. Look for debris or dirt that may be blocking the flow of water.
- Next, examine the connection between the water source and the pressure regulator. Make sure it’s securely attached and there are no leaks or loose fittings.
- Finally, inspect the pressure regulator itself. Make sure it’s set at the correct pressure level for your sprinkler system and that it’s functioning properly.
By thoroughly examining the water source and pressure regulator, you can identify any issues that may be causing a loss of pressure in your sprinkler system. Once this inspection is complete, you can move on to examining the sprinkler heads for damage or clogs.
Examine the Sprinkler Heads for Damage or Clogs
Take a look at your sprinkler heads to see if there are any signs of damage or clogs. Proper sprinkler head maintenance is crucial for the optimal functioning of your sprinkler system. Inspect each sprinkler head carefully for any visible cracks, leaks, or broken parts. Additionally, check if there is any debris or dirt obstructing the nozzle or filter screen. Clogs in the sprinkler heads can significantly reduce water pressure and affect the uniformity of water distribution across your lawn. To help you identify potential issues with your sprinkler heads, refer to the table below:
| Issue | Possible Cause |
|---|---|
| Low pressure | Clogged nozzle or filter screen |
| Uneven spray pattern | Damaged rotor or spray head |
| Leakage | Cracked body or worn-out seal |
By troubleshooting these common problems, you can ensure that your sprinkler system operates efficiently. Now, let’s move on to verifying the valve settings and control panel programming in order to further diagnose any issues with your system.
Verify the Valve Settings and Control Panel Programming
Now, let’s make sure the valve settings and control panel programming are properly set up, so we can have full control over our sprinkler system. Can you imagine how convenient it would be to schedule watering times without even leaving your home?
To troubleshoot the valves, start by checking if they’re fully open or closed. Sometimes, valves can get stuck in a partially open position, causing a decrease in water pressure.
Additionally, inspect the wiring connections at the control panel and make sure they’re secure and not damaged. Regular maintenance of the control panel is crucial to avoid any malfunctions or programming errors.
By verifying the valve settings and performing control panel maintenance, you’ll have a well-functioning sprinkler system that ensures efficient watering.
Now let’s move on to adjusting the water pressure and flow rate for optimal performance.
Adjust the Water Pressure and Flow Rate
To optimize the performance of your sprinkler system, you’ll want to ensure that the water pressure and flow rate are adjusted just right. Adjusting these factors can help prevent issues such as low pressure or inadequate coverage. Here are some adjustment techniques and troubleshooting tips to consider:
- Check the water pressure: Use a pressure gauge to measure the incoming water pressure. Ideally, it should be between 40-60 PSI (pounds per square inch). Adjust the pressure regulator if necessary.
- Flow rate adjustment: The flow rate determines how much water is delivered by each sprinkler head. Use an adjustable wrench to turn the flow control screw on each head clockwise to decrease flow or counterclockwise to increase it.
- Nozzle selection: Different nozzles have different precipitation rates, so choose ones that match your desired watering needs.
By following these adjustment techniques and troubleshooting tips, you can ensure optimal performance for your sprinkler system. Next, let’s consider the age and condition of the system when addressing any potential issues.
Consider the Age and Condition of the Sprinkler System
Check the pulse of your aging sprinkler system to ensure it’s still pumping life into your garden. As sprinkler systems age, they can experience wear and tear that may result in decreased water pressure. Consider upgrading your system if it’s old or showing signs of deterioration.
Newer models are often more efficient and can provide better water pressure and coverage. Additionally, take into account any potential water restrictions in your area that may require you to adjust your system accordingly. Upgrading to a newer, more advanced sprinkler system can help mitigate these issues and ensure optimal performance for years to come.
To address any concerns with your current system or explore upgrade options, consult a professional for expert assistance and repairs. They’ll be able to assess the condition of your sprinkler system and offer guidance on the best course of action moving forward without compromising its functionality.
Consult a Professional for Expert Assistance and Repairs
If considering the age and condition of your sprinkler system hasn’t resolved the issue of lost pressure, it’s time to seek expert assistance. Consulting a professional will ensure that you receive accurate advice and proper repairs.
Here are three alternative solutions to troubleshoot common issues with your sprinkler system:
- Check for clogged nozzles or valves: Over time, debris can accumulate and obstruct water flow. A professional can help identify and clean any clogs, ensuring optimal performance.
- Inspect for leaks: Leaks in pipes or fittings can significantly impact water pressure. An expert will conduct a thorough inspection to detect and repair any leaks, preventing further loss of pressure.
- Evaluate the irrigation controller: Faulty programming or outdated technology in your irrigation controller may cause pressure problems. A professional can assess its functionality and recommend necessary updates or replacement options.
Remember, relying on a professional’s expertise will save you valuable time and effort while effectively resolving the lost pressure issue in your sprinkler system.
Frequently Asked Questions
How do I check for leaks or blockages in my sprinkler system?
To check for leaks or blockages in your sprinkler system, start by visually inspecting all the components, such as pipes, valves, and sprinkler heads. Look for any signs of water seepage or damage.
Then, conduct a pressure test to identify potential leaks using a pressure gauge. For troubleshooting blockages, flush out the system by removing and cleaning clogged sprinkler heads or using compressed air to blow out debris from the pipes.
What should I look for when inspecting the water source and pressure regulator?
When inspecting the water source for your sprinkler system, first ensure that the water supply valve is fully open.
Check for any debris or sediment that may be clogging the intake screen or filter.
Next, examine the pressure regulator to ensure it’s functioning properly.
Look for any signs of damage or leaks, and adjust the pressure if necessary.
Proper inspection of both the water source and pressure regulator will help maintain adequate water pressure in your sprinkler system.
How can I determine if the sprinkler heads are damaged or clogged?
To troubleshoot clogged sprinkler heads, start by examining each head individually. Inspect for any visible debris or dirt that may be obstructing the water flow. Gently remove any blockages using a small brush or needle.
Additionally, check if the nozzle is damaged or worn out; replace it if necessary. Lastly, ensure that the filter screens are clean and unclogged.
Regular sprinkler head maintenance like this will help maintain optimal water pressure and keep your system running smoothly.
What steps should I take to verify the valve settings and control panel programming?
To troubleshoot sprinkler valves and check control panel programming, start by ensuring the valves are fully open. Statistics show that 80% of low-pressure issues stem from closed or partially closed valves.
Next, inspect the control panel for common programming mistakes like incorrect watering schedules or overlapping zones. Adjust settings as needed to ensure proper functioning.
By following these steps, you can effectively verify valve settings and control panel programming, resolving any potential issues with your sprinkler system.
How can I adjust the water pressure and flow rate in my sprinkler system?
To adjust the water pressure and flow rate in your sprinkler system, start by troubleshooting water pressure issues. Check for any clogged or damaged sprinkler nozzles that may be affecting the flow. Clean or replace these nozzles as necessary.
Additionally, ensure that the control panel programming is correctly set to allow for proper water pressure regulation. By adjusting sprinkler nozzles and addressing any underlying problems, you can optimize the water pressure and flow in your system.

I’m Carlos Robert, a passionate gardener, and blogger. With years of experience and knowledge in the field of garden watering, I have created a blog to share my insights and tips on the topic. I strive to provide readers with detailed information about all aspects of sprinkler systems, from garden sprinklers to fire sprinklers, along with nozzles, hoses, and other related products. I love helping my readers create the perfect garden with their ideal setup!