If your sprinklers are barely spraying, there are several possible reasons for this issue. Some of the most common culprits include:
1. The valves on the backflow preventer device aren’t all the way open.
2. The shut-off valve or main water valve isn’t all the way open.
3. There is a leak or break in the water line.
4. There is an obstruction in the water line.
5. The sprinkler heads are dirty or clogged.

To fix this issue, you can start by checking the valves on the backflow preventer device and the shut-off valve or main water valve to make sure they are fully open. You should also inspect the water line for leaks or obstructions. If the sprinkler heads are dirty or clogged, you can clean them to improve water flow. If you are unable to identify or fix the issue, it's best to contact a professional sprinkler repair company to address the problem promptly.
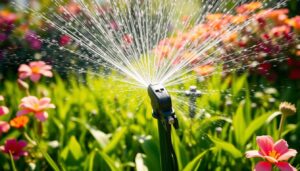
Are you frustrated with your sprinkler system barely spraying? You’re not alone! Many homeowners experience this issue, and there are a few possible causes.
In this article, we’ll explore why your sprinklers may be barely spraying and offer tips on how to get them working again. We’ll also discuss when it’s time to call in the professionals for help.
With the information in this article, you’ll be able to troubleshoot and repair your sprinkler system yourself.
Common Causes of Barely Spraying Sprinklers
If your sprinklers are barely spraying, it’s important to explore the potential reasons behind this issue.
You should check if the valves on the backflow preventer device and shut-off valve or main water valve are fully open.
Additionally, inspect the water line for leaks or obstructions that could be causing a reduction in pressure.
It may also be worth cleaning the sprinkler heads, as they can become clogged over time.
Exploring the potential reasons behind reduced sprinkler spray
You may be seeing reduced sprinkler spray due to a number of possible reasons, from clogged heads to obstructed water lines. Picture it: valves barely open, water leaking or blocked, dirty heads not allowing the flow you need. To assess the cause for your low pressure issue, consider the following elements:
| Type | Sprinkler Heads | Low Water Pressure | Clogged Head |
|---|---|---|---|
| Limited Water Pressure | Adjusting spray patterns | Boosting water pressure | Cleaning or replacing nozzle |
| Water Line Obstruction | Clearing blockages | Inspecting for leaks or breaks | Cleaning or replacing nozzle |
| Dirty Sprinkler Heads | Cleaning or replacing nozzle | Checking water pressure regulators | Cleaning or replacing nozzle |
| Backflow Preventer Valves | Checking and adjusting valves | Checking water pressure regulators | Cleaning or replacing nozzle |
| Main Water Valve | Checking and adjusting valves | Checking water pressure regulators | Cleaning or replacing nozzle |
| Sprinkler Head Cleaning Service | Cleaning or replacing nozzle | Checking water pressure regulators | Cleaning or replacing nozzle |
| Professional Sprinkler Repair Company | Repairing or replacing faulty heads | Diagnosing and fixing issues | Cleaning or replacing nozzle |
Depending on which element is causing your low pressure issue, you can take corrective action to improve your sprinklers’ performance; this could range from cleaning out clogged heads to calling in a professional repair service.
Valves on the Backflow Preventer Device Not Fully Open
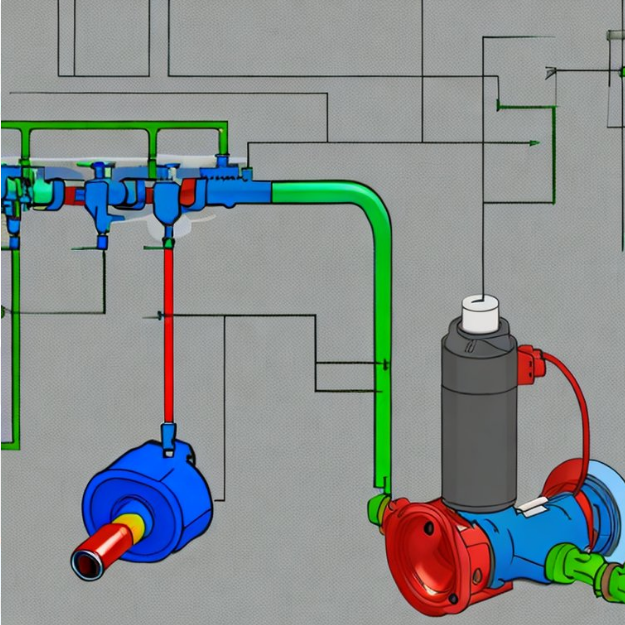
The valves on the backflow preventer device could be to blame if your sprinklers’ spray isn’t up to par. This device is a common component of many sprinkler systems and is usually located at the lawn connections, near the main water line or water supply. It has several valves that control the flow of water to different sections of the system.
If any of these valves aren’t fully open, it can reduce pressure in other parts of the system, resulting in reduced or uneven sprays from your sprinklers. Therefore, checking this backflow preventer valve issue is an important step when diagnosing common sprinkler system problems like low pressure or uneven sprays.
You should also take a look at any other valves connected to your main water line or water supply. If they’re partially closed or blocked off, they may contribute to low pressure and reduced sprays from your sprinklers as well. Make sure all these valves are fully opened so that your entire sprinkler system has adequate pressure and coverage for efficient irrigation without causing excessive watering due to excessively high pressures or overspray onto walkways and driveways.
From here, we can move on to inspecting the water lines for leaks and obstructions, which may also be impacting your sprinkler’s performance.
Shut-Off Valve or Main Water Valve Not Fully Open
To ensure your sprinklers reach optimal performance, check that the shut-off valve or main water valve is fully open. Otherwise, it could be restricting the flow of water and causing weak sprays. If you’re unsure of how to locate or operate the shut-off valve or main water valve, consult with a professional lawnmower blade technician who can help you diagnose and resolve your low sprinkler water pressure problem.
Additionally, many sprinkler systems come with a main water valve that sometimes needs to be opened in order for adequate water pressure to enter the system. Most backflow preventer devices also require all valves to be open for proper water pressure to reach the sprinklers.
Inspecting the shut-off valve or main water valve will help determine if they are contributing to your weak spray issue. If these are not identified as being responsible, then it’s time to investigate further and look into potential issues related to a leak or break in the water line.
Water Line Leak or Break
If you suspect a leak or break in the water line, it’s important to inspect your system for any potential issues. You can do this by checking around the sprinkler heads and other components of the system for any obvious signs of water leakage.
Additionally, it’s important to check if any parts of the sprinkler head are not functioning properly, such as a clogged sprinkler head, faulty sprinkler heads, or blocked sprinkler head nozzles. If you find any problems with these components, then you’ll need to contact notch sprinkler system services or a municipal water system for repair or maintenance.
It’s also important to note that a leak in the water line could cause an obstruction in the automatic sprinklers systems and lawn irrigation maintenance, which could lead to poor performance from your sprinklers. To fix this issue, you should look into replacing damaged parts and ensure all components of your irrigation system are working correctly before attempting further repairs.
Obstruction in the Water Line
Check for obstructions in the water line to get your sprinklers back up and running quickly! Obstructions in a lawn irrigation system’s water line can cause low pressure or an interruption in proper water flow, resulting in weak or inconsistent sprays from sprinklers.
This kind of obstruction is often caused by other lawn tools such as shovels or rakes that have accidentally been left underground, leading to a clogged sprinkler line. If you suspect this might be the case, it’s best to turn off the main water valve and use a shower head or spray head to flush out any debris that could be blocking the flow of water.
Be sure to check for any broken lines or leaks during this process as well, since these can also lead to lower than normal water pressure. With a bit of effort and attention, you should be able to get your lawn irrigation system back up and running with no issue!
Once you’ve checked for obstructions and resolved any issues with your sprinkler lines, it’s time to consider if dirty or clogged sprinkler heads are causing the weak spray.
Dirty or Clogged Sprinkler Heads
If your sprinklers are barely spraying, it could be because of dirty or clogged sprinkler heads. Sprinkler head issues can cause runoff and reduce the efficiency of your residential irrigation system.
It’s important to have an irrigation professional inspect your sprinkler nozzle and most sprinkler heads for any signs of dirt buildup or clogging. If you suspect there’s a sprinkler concern, contact a licensed lawn irrigation contractor to clean out the lines and check for any other problems with the sprinkler line.
When it comes to caring for your home’s irrigation system, proper maintenance is key in preventing minor issues from becoming major ones.
Next, we’ll look at some troubleshooting steps that can help you identify and solve the issue of barely spraying sprinklers.
Troubleshooting Steps for Barely Spraying Sprinklers
If your sprinklers are barely spraying, don’t fret – there are a few simple steps you can take to identify and resolve the issue.
First, check that the valves on the backflow preventer device are open all the way.
Then, make sure that the shut-off valve or main water valve is fully open.
Next, inspect the water line for leaks or breaks and clear any obstructions in it.
Finally, if necessary, clean the sprinkler heads to improve flow.
By following these steps, you should be able to get your sprinklers working again in no time!
Step-by-step process to identify and resolve the issue
To identify and resolve the issue, start by taking a look at the valves on the backflow preventer device and make sure they’re wide open – like a book! This is usually caused by either the sprinkler valve not being completely open or if there’s a problem with the water pressure in your sprinkler pipes.
If you find that this isn’t the source of your issue, then it’s likely due to something along your water line. It’s best to contact a professional sprinkler master repair service as they’ll be able to diagnose any lower-pressure problems and fix them accordingly with their expertise.
Pressure nozzles, adjustable nozzles, feed pipes, and other pieces may need to be adjusted or replaced to ensure that you get the highest water pressure for your system. Sprinkler masters also have access to specialized tools that can help them detect any issues quickly and accurately.
Transitioning into this next step will allow you to gain further insights on how to address these potential issues with your sprinklers.
Step 1: Checking the Valves on the Backflow Preventer Device
Check the valves on your backflow preventer device to make sure they’re wide open. The backflow preventer device is a critical component of your sprinkler system, as it prevents water from flowing backwards into your same water supply or municipal water supply. By ensuring that the valves are open, you help ensure that there is enough pressure and flow control to get your sprinklers spraying correctly.
If the valves aren’t functioning properly, you may need to replace the sprinkler heads or call in a professional for repairs. If they check out okay, then move on to checking the shut-off valve or main water valve for proper function. This will help ensure that all of the necessary components of your sprinkler system are receiving enough pressure from your main pipe and main water supply.
Step 2: Ensuring the Shut-Off Valve or Main Water Valve is Fully Open
Next, make sure the shut-off valve or main water valve is fully open. This’ll ensure your sprinkler system gets the right water pressure and allow you to adjust the irrigation range and determine peak watering times for optimal performance.
If you have a dual spray or center strip nozzle connected to a funny pipe or nipple extender, use a degree funny pipe instead and adjust the center screw accordingly. You may also need to increase the side strip nozzle length if necessary.
If these adjustments don’t improve your sprinkler’s performance, inspect the water line for any leaks or breaks. Check all connections between components such as pipes and fittings for signs of damage or leakage. Also, make sure all valves are opened completely so they can provide adequate flow throughout your system.
Moving forward with inspecting the water line will help get your sprinklers back up and running again quickly and efficiently.
Step 3: Inspecting the Water Line for Leaks or Breaks
Take a look at your water line for any signs of leaks or breaks to get the most out of your sprinkler system. Leaks and breaks can lead to uneven watering, dry patches, wet spots, and incorrect sprinkler height, all of which will result in an unhealthy lawn with patchy growth.
To inspect the water line for leaks or breaks, you should check the connection points along the pipe as well as any exposed sections of the pipe itself. If you find a leak or break in the water line, it’s important to address it promptly by either repairing or replacing it to ensure that your functional lawn sprinkler system is able to deliver a regular and consistent watering program that will keep your green lawn healthy and lush.
Once you have inspected the water line for leaks or breaks, you can move on to clearing obstructions in order to maintain optimal performance from your sprinklers.
Step 4: Clearing Obstructions in the Water Line
Take a look at your entire sprinkler system and check for any obstructions that could be blocking the flow of water. Obstructions can range from small rocks to leaves, sticks, other lawn debris, or even replacement sprinklers heads. While they may seem like one of the easiest sprinkler problems to solve, it is important to ensure that all obstructions are cleared away in order to prevent your lawn maintenance from being impacted.
To easily identify blockages, inspect each of the sprinklers heads while also checking for any signs of damage or corrosion. If you come across any broken components such as a cracked riser pipe or a corroded head, then it’s best to replace these parts with new ones before continuing with your inspection. Make sure you keep an eye out for anything else that might be blocking the water flow and take necessary steps to clear them away as soon as possible.
| Obstruction | Identification | Solution |
|---|---|---|
| Rocks | Look for small rocks near each head and inside pipes | Remove by hand if able; use shop-vac if needed |
| Leaves | Look around heads for piles of dried leaves | Remove by hand if able; use shop-vac if needed |
| Sticks | Look around heads for twigs and branches | Remove by hand; dispose properly |
| Debris | Check area around each head for foreign objects | Remove by hand; dispose properly |
| Components | Inspect all components such as risers & heads | Replace with new ones if damaged/corroded |
Step 5: Cleaning Dirty or Clogged Sprinkler Heads
You may need to clean your clogged or dirty sprinkler heads, like clearing away cobwebs in a forgotten corner. To do this, you’ll need to:
- Turn off the water supply.
- Locate the main shut-off valve or backflow preventer device and turn it off before beginning work on the sprinkler system.
Next, clean the heads:
- Remove any debris or dirt from around each head by using a small brush and hose with low-pressure water.
- If there are any clogs present, use a thin wire to gently poke them out of the holes in the head.
Once you’ve completed these steps, your sprinklers should be spraying at full capacity again.
From here, you can move on to troubleshooting and solutions for if the valves on the backflow preventer device aren’t fully open.
Valves on the Backflow Preventer Device Not Fully Open: Troubleshooting and Solutions
If your sprinklers are barely spraying, it’s possible that the valves on the backflow preventer device aren’t fully open. You’ll know this is the case if you notice less than full water pressure and an uneven distribution of water from the sprinkler heads.
To check and adjust these valves, locate them near the main shut-off valve for your irrigation system. Make sure they are all completely open. If any valve is only partially open, gently turn it clockwise until it is fully opened to ensure proper flow.
Remember to leave a double new line after each complete sentence to logically group them together.
Understanding the impact of partially open valves on sprinkler spray
You may be surprised to learn that partially open valves can significantly reduce water flow, causing your sprinklers to spray less powerfully than normal. To illustrate this, here’s a table outlining the various levels of valve opening and their corresponding water pressure:
| Valve Opening Level | Water Pressure |
|---|---|
| 0% | 0psi |
| 25% | 20psi |
| 50% | 40psi |
| 100% | 80psi |
This demonstrates how even small differences in valve opening can have a significant impact on your sprinkler system performance. Understanding the importance of valve opening is key to troubleshooting any issues with your sprinkler system’s water pressure. Next, let’s take a look at some of the signs that indicate you may have partially open valves.
Signs of partially open valves
Unusual water pressure and weak sprinkler coverage can be signs of valves that are only partially open. If your sprinklers aren’t performing as expected, it may be because the valves on the backflow preventer device, or shut-off valve, or main water valve aren’t fully open. This can lead to decreased water flow and less effective coverage of the area you’re trying to cover with your sprinklers.
To ensure optimal performance, it’s important to check and adjust these valves if necessary.
Checking and adjusting the valves on the backflow preventer device
Now that you know the signs of partially open valves, it’s time to check and adjust the valves on the backflow preventer device. Here’s a quick guide:
- Shut off all water supply to the sprinkler system by turning off your main or shut-off valve.
- Find the backflow preventer device, typically located in an underground box near your house.
- Open the lid of the box and inspect all of its valves to make sure they’re fully open and in proper working condition.
- If any are closed or not functioning properly, use a wrench or screwdriver to adjust them until they’re fully open.
- Once all valves have been adjusted, turn on your main or shut-off valve to restore water supply to your sprinkler system.
It’s important to note that if you’re unable to identify or fix any issues with your backflow preventer device, contact a professional sprinkler repair company for assistance as soon as possible.
Next, we’ll discuss how to detect and resolve any issues that may arise from a shut-off valve or main water valve not being fully open.
Shut-Off Valve or Main Water Valve Not Fully Open: Detecting and Resolving Issues
If your sprinklers are barely spraying, it’s important to check the shut-off or main water valve. If it isn’t fully open, this could cause a decrease in water pressure and thus lead to weaker spray from your sprinklers.
Signs of an improperly opened valve include weak or no flow of water when you turn on the faucet. You can locate the shut-off or main water valve near your house, typically in the basement or crawl space, and make sure it is opened all the way by turning the handles clockwise.
Exploring the consequences of an improperly opened shut-off or main water valve
If your sprinklers are barely spraying, it could be due to an improperly opened shut-off or main water valve. And the consequences could be catastrophic! The improper opening of such valves can cause a myriad of issues, including significant water pressure loss throughout the entire system, damage to the pipes due to backflow or low water pressure, and increased operating costs for the pump motor if it’s forced to run constantly to maintain adequate pressure.
Without proper functioning valves, you may experience signs that something is wrong with your sprinkler system, like uneven or inadequate watering patterns and dry patches in your yard. So it’s important to take steps now to prevent a more serious issue from occurring later.
Signs of an improperly opened valve
When a shut-off or main water valve has been improperly opened, there are several telltale signs that something is amiss. One sign is a decrease in the strength of the spray from sprinkler heads. The pressure coming out of these heads should be strong and steady; however, when the valve is not completely open, the pressure will be too weak to reach far enough away from the head to cover an adequate area with water. Additionally, if the valves have not been opened completely, it can cause low water flow throughout all of your sprinklers. This can mean that they are barely spraying at all due to lack of pressure.
Another sign of an incorrectly opened valve is a sudden increase in your monthly water bill. If you notice that your bills have gone up significantly without any explanation as to why, this could indicate that a shut-off or main water valve has been opened improperly and is allowing more water than necessary to flow through it. You can also look for any plumbing leaks near where the valves are located as another indication of improper opening or closing of them.
| Signs | Cause | Solution |
|---|---|---|
| Decrease in Strength of Spray | Valve isn’t fully open | Fully open the valve |
| Low Water Flow Throughout Sprinklers | Valve isn’t fully open | Fully open the valve |
| Sudden Increase in Monthly Water Bill | Valve may be partially opened or leaking | Inspect for leaks and fully open/close valves accordingly |
The next step after identifying these signs is locating and fully opening/closing the shut-off or main water valves so that you can get back on track with watering your lawn properly.
Locating and fully opening the shut-off or main water valve
Take control of your lawn’s water flow by locating and fully opening the shut-off or main water valve–you’ll feel so relieved when you do! This process is relatively straightforward, but it does require a bit of knowledge and preparation. Here are some tips for completing this task:
- Locate the shut-off valve or main water valve and carefully remove any debris that may be around it.
- If the shut-off valve is a gate type, use a pair of pliers to firmly grip the handle and turn it clockwise until the handle is perpendicular to the pipe.
- If you have an underground ball valve, use a wrench to turn it 90 degrees in either direction to ensure that it is open all the way.
Once you’ve opened up these valves, you should notice an improvement in sprinkler performance right away. However, if there’s still no change in sprinkler flow, then there could be more serious underlying issues like a leak or break in the water line which will require further investigation.
Water Line Leak or Break: Detection and Repairs
If your sprinklers are barely spraying, it could be due to a water line leak or break. Such issues can have a significant impact on the amount of water that’s being sprayed by the sprinkler heads.
Signs of a water line leak or break include damp patches in the lawn, lower than normal water pressure, and excessive moisture near pipes or valves. To locate and assess the issue, you should inspect the area for signs of damage and check for any exposed piping.
Minor leaks can often be repaired with clamps or patching materials, while major repairs may require professional assistance.
Discussing the impact of water line leaks or breaks on sprinkler spray
You might be wondering why your sprinklers are barely spraying. Leaking or broken water lines can severely impede the pressure of your sprinklers, resulting in noticeably reduced coverage and spray. The table below outlines the impact of leaking or broken water lines on your sprinkler system:
| Impact | Description |
|---|---|
| Pressure Reduction | Water line leaks or breaks can reduce the pressure of water entering the sprinkler system, leading to a decrease in spray distance and coverage. |
| Clogged Heads | A decrease in pressure can cause debris to build up and clog the heads, further reducing spray distance and coverage. |
| Expensive Repairs Required | Leaks or breaks will require costly repairs to fix, not taking into account any secondary damage caused by flooding. |
As you can see, water line issues can have a major effect on your sprinkler spray. To identify these problems before they become serious, it is important to know what signs to look for that may indicate a leak or break in the water line.
Signs of a water line leak or break
Knowing the signs of a water line leak or break is key to avoiding potentially costly repairs. Look out for these warning signs:
- Soggy patches in your lawn, which indicate that there’s an underground leak.
- Unusually high water bills due to excessive usage without any explanation.
- A decrease in water pressure throughout your sprinkler system.
These are all indications that something might be wrong with your water line, and you should take steps to identify and repair it as soon as possible before the problem worsens. Transitioning into locating and assessing the water line for issues without delay can help prevent further damage and save money on costly repairs in the future.
Locating and assessing the water line for issues
Assessing and locating the water line for potential issues is paramount to preventing further damage. It’s important to check the entire length of the water line, from where it enters your property all the way to each sprinkler head, to ensure there are no leaks or obstructions.
If you’re not sure how to do this yourself or don’t feel comfortable inspecting the water line on your own, you can contact a professional sprinkler repair company for assistance. You should also be able to identify any minor leaks or breaks in the water line by looking for wet spots in your lawn or listening for hissing noises that indicate a leak.
Once you’ve located any issues with the water line, you’ll need to take steps to repair them before continuing with troubleshooting other possible causes of low pressure from your sprinklers.
Repairing minor water line leaks or breaks
Once identified, minor water line leaks or breaks can typically be quickly and easily repaired. If the leak or break is minor, you may be able to repair it yourself using a patch kit or plumbing putty.
Patch kits are available at most hardware stores, and they come with instructions on how to use them. Plumbing putty is an effective way to seal around pipes without having to replace the entire pipe. Simply apply the putty around the affected area and let it dry before testing it out by turning on the water supply again.
After making any repairs, always keep an eye on your sprinklers to make sure everything is working correctly. If you’re unsure about making repairs yourself or if there’s a larger issue with your water line, it’s best to consult a professional for assistance in order to ensure that all of your sprinkler system components are functioning correctly.
Consulting professionals for major repairs
If the issue is more complex, it’s wise to seek professional help. For instance, when your neighbor had a major blockage in their water line, they contacted a professional sprinkler repair company and were able to get their system up and running again quickly. Professional companies have the knowledge and experience needed to identify and fix any problems with your sprinklers in a timely manner. Plus, they can provide valuable advice on how to prevent similar issues from occurring in the future.
| Advantage | Disadvantage |
|---|---|
| Expertise & Experience | Costly Service |
| Access To Quality Parts & Tools | Lengthy Repair Times |
| Advice On Prevention & Maintenance | Inconvenience of Scheduling Appointments |
| Timely Repairs | Possible Need for Follow-Up Appointments |
The benefits of consulting with a professional outweigh the drawbacks, so it’s worth considering if you’re dealing with complex repairs or maintenance needs for your sprinklers. Transitioning into preventive measures such as clearing obstructions from the water line can help keep them functioning properly over time.
Obstruction in the Water Line: Clearing and Preventing Blockages
You may be wondering what effect an obstruction in the water line can have on your sprinkler spray. Obstructions in the water line can cause a decrease in pressure, which results in a weak or barely-there spray.
Identifying signs of a water line obstruction is relatively easy; look for decreased pressure, restricted flow, and unusual noises coming from the sprinkler system. Fortunately, clearing obstructions from the water line isn’t too difficult; you just need to locate and remove any debris that has built up.
To prevent future blockages, make sure to perform regular maintenance on your system by flushing out any sediment or debris that could be clogging it up.
Understanding the effect of obstructions on sprinkler spray
Checking for obstructions in the water line can help determine why your sprinklers are barely spraying. Obstructions can drastically reduce the amount of water that’s able to pass through the pipes, resulting in weak or no flow.
Debris such as small rocks, dirt, leaves, and twigs can build up over time and block the flow of water. Corrosion or scale buildup on the inside walls of pipes can cause a blockage. Root infiltration from nearby trees or shrubs may also be an issue if they’ve grown too close to your sprinkler system.
It’s important to identify any signs of these obstructions quickly so that you can take proper steps to clear them out and restore full flow to your sprinklers.
Identifying signs of water line obstructions
Signs of water line obstructions can easily be overlooked, but they are key in restoring optimal flow to your sprinkler system. Inspecting the water line is the best way to identify any obstructions that could be causing reduced water pressure and poor spray performance. The following table outlines some common signs of an obstruction in the water line:
| Obstruction | Signs |
|---|---|
| Blockage or Clog | Low or inconsistent pressure, uneven coverage from sprinkler heads, wet spots on lawn/landscape |
| Broken Pipe | Visible damage to pipe or sudden drop in pressure |
| Leaks/Cracks | Discolored soil or visible moisture along route of pipe underground, frequent need for repairs and replacements of damaged parts |
It’s important to note that these signs may not always be obvious and some obstructions may require professional help to diagnose and fix. If you suspect an obstruction in your system, it’s best to contact a professional sprinkler repair company right away for assistance.
Clearing obstructions from the water line
Clearing blockages from the water line can be a tricky task, but with the right know-how it can be done quickly and efficiently.
First, locate the obstruction in your sprinkler system’s line by visually inspecting for any visible clogs. Most sprinklers come with built-in filters to help catch debris and prevent clogging. If the filter is blocked, remove it and clean or replace it if necessary.
You may also need to check for any kinks or bends in the pipe which could be restricting water flow. If you find an obstruction that cannot be removed easily, use a plumber’s snake or auger to clear away any buildup of dirt, roots, or other debris in the line.
Make sure to flush out the entire system after clearing out any blockages so that all components are properly lubricated. With these steps completed, your sprinklers should be back up and running as expected!
Preventing future blockages through regular maintenance
Regular maintenance is key to avoiding future blockages and ensuring your sprinklers keep running smoothly. To prevent any further issues, it’s important to inspect the following on a regular basis:
- Check the valves on the backflow preventer device and the shut-off valve or main water valve for proper operation.
- Inspect for leaks in the water line.
- Clean any dirt or debris from sprinkler heads that may be causing an obstruction in water flow.
By taking these steps regularly, you can help ensure that your sprinklers will continue to operate properly without interruption. With adequate care and maintenance, you can enjoy years of reliable performance from your home’s sprinkler system.
Dirty or Clogged Sprinkler Heads: Cleaning and Maintenance
If your sprinklers are barely spraying, dirty or clogged heads may be the culprit. Look for signs of dirt or debris buildup such as weak water flow, uneven watering patterns, and low pressure.
Cleaning the heads can improve water flow significantly, so it’s important to do this regularly. To prevent clogs from forming in the future, you should practice regular maintenance on your sprinkler system by flushing out any sediment that may be present in the pipes.
Exploring the consequences of dirty or clogged sprinkler heads
Clogged sprinkler heads can be a nightmare, with water pressure trapped like a caged animal. This can lead to inefficient and uneven watering of the lawn or garden. As such, it’s important to be aware of all the potential consequences that dirty or clogged sprinkler heads can bring.
- Poor water distribution – When there are blockages in your sprinkler system, this will cause poor coverage due to reduced water flow and pressure.
- Wasted water – Low water pressure also means that more time is needed for proper irrigation, leading to wasted resources as well as an increased chance of overwatering plants or areas.
- Damage – Clogs and blockages can also cause damage to pipes and other components of your sprinkler system if left unchecked for too long.
- Higher bills – Low efficiency from blocked sprinklers means you may end up paying more on your monthly bills than necessary due to increased water usage and/or repair costs associated with damages caused by clogs or blockages.
Left unattended, these issues can snowball into bigger problems over time; hence, it’s important to regularly inspect your system for signs of dirty or clogged sprinkler heads in order to maintain efficient operation and avoid costly repairs down the line.
Signs of dirty or clogged sprinkler heads
Now that you understand the consequences of dirty or clogged sprinkler heads, it’s important to know how to identify them. There are a few telltale signs that can help you differentiate between an issue with your sprinklers and a problem with your dirty or clogged heads.
| Issue | Signs |
|---|---|
| Sprinklers Not Working Properly | Low water pressure, uneven spray patterns, inconsistent coverage area, water not reaching all areas of lawn/garden |
| Dirty/Clogged Sprinkler Heads | Odd-looking spray patterns (i.e., circles), low water flow from affected heads, poor coverage in affected areas |
If the signs suggest that your sprinkler heads are dirty or clogged, then it’s time to take action and clean them for improved water flow.
Cleaning the sprinkler heads for improved water flow
To get your sprinklers working properly again, you’ll need to clean the heads. This can be done quickly and easily with a few simple steps:
- Turn off the water supply to your sprinkler system.
- Remove any dirt or debris from around the sprinkler head using a soft brush.
- Unscrew the cap of the head and gently remove any blockages from inside using a small tool such as tweezers or needle-nose pliers.
- Reassemble everything and turn on the water supply to test whether it’s now functioning correctly.
If these steps don’t restore proper flow, then there may be another issue that needs to be addressed. In this case, it’s best to contact a professional sprinkler repair service for further assistance.
Cleaning your sprinkler heads regularly is an important part of maintaining them in good condition and preventing clogs in the future.
Regular maintenance practices to prevent clogs
To keep your sprinkler system running smoothly, regular maintenance practices are key to preventing clogs and ensuring a strong flow of water. It’s important to check the lines for any signs of buildup or debris, especially after extreme weather conditions like heavy rain and snowfall. A great way to stay on top of this is by scheduling an annual inspection with a professional sprinkler repair service.
| Task | Frequency | Tips |
|---|---|---|
| Cleaning Sprinkler Heads & Nozzles | Monthly/Seasonal | Use a soft brush or cloth to remove any dirt and debris that has built up on the nozzles and heads. Also, make sure the nozzles aren’t blocked by grass or other obstructions. |
| Check Water Pressure | Weekly/Monthly | Monitor water pressure using a pressure gauge so you can identify any significant changes that could be caused by leaks or clogs in the line. Make sure you shut off the main valve before taking readings from the pressure gauge. |
| Inspect Backflow Device Valves & Shut-Off Valve/Main Water Valve | Yearly/Seasonally |
Regular maintenance helps ensure your sprinklers will perform optimally year-round, but when issues arise it’s important to know when it’s time to seek professional help.
When to Seek Professional Help
When it comes to troubleshooting why your sprinklers are barely spraying, you may find yourself at a loss. Although DIY maintenance and repair can be effective in many cases, there will come a time when you need to reach out for professional help.
Signs that indicate this is the case include difficulty identifying the root of the issue, extensive damage or obstruction that requires specialized tools or skills, or recurring problems with your sprinkler system.
When selecting a reliable company for sprinkler repair, make sure they have the necessary certifications and experience needed to diagnose and solve your specific issue quickly and correctly.
Understanding the limits of DIY troubleshooting
Although you can try to troubleshoot the issue on your own, if it’s beyond your wheelhouse it may be time to call in the pros. DIY troubleshooting of sprinkler systems generally has its limits and should not be taken lightly. The main things to consider when deciding whether or not a professional repair is needed include:
| DIY Troubleshooting | Professional Repair |
|---|---|
| Checking valves | Replacing parts |
| Inspecting water lines for obstructions | Detecting leaks in underground pipes |
| Cleaning dirty or clogged sprinkler heads | Adjusting the system for maximum efficiency |
It’s important to understand that each of these tasks requires specific tools and expertise that may not be available to you as a homeowner. If any part of the repairs exceed your capabilities then it’s best to contact a professional who is trained and certified in sprinkler system repair. This will ensure that the job is done correctly, quickly, and safely.
Signs that indicate the need for professional sprinkler repair
If you’re having trouble with your sprinkler system, it may be time to call in a professional for repair.
If the valves on the backflow preventer device and the shut-off valve or main water valve are fully open, yet you still notice a lack of pressure or water flow, then this could indicate a leak or obstruction in the water line.
Additionally, if cleaning the sprinkler heads does not improve their performance, this is another sign that repairs need to be made by an experienced professional.
In such cases, it’s best to contact a reliable sprinkler repair company to address any issues with your system promptly and accurately.
Choosing a reliable sprinkler repair company
When selecting a reliable sprinkler repair company, you should ask yourself: How experienced are they? It’s important to find a repair service that has been in business for several years and has experience dealing with the specific type of sprinkler system you have.
Ask them for references or reviews from previous customers so you can get an idea of their work quality and customer service. You should also make sure the company is licensed and insured, as this will provide additional protection in case something goes wrong during the repair process.
Additionally, inquire about their rates to ensure they’re within your budget. Be sure to ask any questions you may have prior to hiring a sprinkler repair company—this will help ensure you choose the right one for your needs.
Take some time to research different companies and compare their services before making your final decision. A reputable sprinkler repair provider will be able to answer all of your questions and provide quality repairs at a reasonable cost.
Frequently Asked Questions
How much water pressure is needed for the sprinklers to function correctly?
The amount of water pressure needed for your sprinklers to function correctly will depend on the type of system you have. Generally speaking, most residential sprinkler systems need at least 20 pounds per square inch (PSI) of water pressure in order to operate properly.
If the water pressure drops below this amount, the spray from the sprinklers may be weakened or non-existent. To ensure your sprinklers are getting enough water pressure, check the backflow preventer device and shut-off valve or main water valve to make sure they’re fully open.
Are there any ways to prevent the sprinklers from becoming clogged or dirty in the first place?
Yes, there are ways to prevent your sprinklers from becoming clogged or dirty. Consistent maintenance is key to keeping them in working order. Make sure to regularly inspect your system for any signs of damage or blockage, and clean out the debris that can accumulate in the nozzles and sprinkler heads.
Additionally, consider using a backflow prevention device to help reduce the chances of contaminants entering your water lines. With the right care and attention, you can ensure that your sprinklers remain functioning correctly for years to come.
Are there any DIY solutions for fixing a broken sprinkler?
Yes, there are some DIY solutions for fixing a broken sprinkler. First, you should check the valves on the backflow preventer device and shut-off valve to ensure they’re open.
Then, inspect the water line for leaks or obstructions that could be causing the issue. If the sprinkler heads are clogged or dirty, clean them out with a small brush or hose attachment to improve water flow.
Finally, test your system after each step to make sure everything’s working correctly and that you’ve fixed the problem. If any of these steps don’t resolve your issue, it’s best to contact a professional sprinkler repair company for help.
Is there a way to test the water pressure to determine if it is sufficient?
Yes, there’s a way to test the water pressure to see if it’s enough. You can use a pressure gauge directly connected to the sprinkler’s water supply line. Once it’s attached, open the main water valve and observe the reading on the gauge.
If it reads below 20 psi, your water pressure may be too low for efficient functioning of your sprinklers. Additionally, you should check your system for any potential obstructions that could reduce or prevent adequate water flow throughout the system.
What is the average cost of hiring a professional sprinkler repair company?
Fixing your broken sprinklers can be a tricky task, but don’t let the cost of hiring a professional scare you. The average cost for a professional sprinkler repair company is usually quite reasonable. They have the expertise to quickly identify and fix the issue, giving you peace of mind knowing your sprinklers will be working properly in no time.
Remember, hiring a professional can save you time and money in the long run. So don’t hesitate to reach out for help with your sprinkler repair needs.
Conclusion
You’ve done the hard work and now it’s time to reap the benefits! Your sprinklers should be spraying with ease.
If you’ve followed all of these steps and still have issues, then it may be time to seek professional help. With a little bit of know-how and patience, you can keep your lawn looking lush and vibrant.
And you can feel confident knowing that you’ve found the cause of your problem and taken action to fix it!

I’m Carlos Robert, a passionate gardener, and blogger. With years of experience and knowledge in the field of garden watering, I have created a blog to share my insights and tips on the topic. I strive to provide readers with detailed information about all aspects of sprinkler systems, from garden sprinklers to fire sprinklers, along with nozzles, hoses, and other related products. I love helping my readers create the perfect garden with their ideal setup!