
Thorough pressure in one sprinkler zone can be caused by multiple factors, including improperly installed valves, leaks from damaged pipes, and debris clogging nozzles. Additionally, a malfunctioning solenoid, timer issues, or a failing pressure regulation valve (PRV) might be responsible. Municipal water supply fluctuations during peak times can also cause pressure drops.
Incorrectly sized pipes and defective pressure regulators further exacerbate the problem. Manual inspections, pressure tests, and timely repairs can address these issues effectively. For a detailed guide to diagnosing and resolving these common culprits, continued engagement with detailed troubleshooting steps is essential.
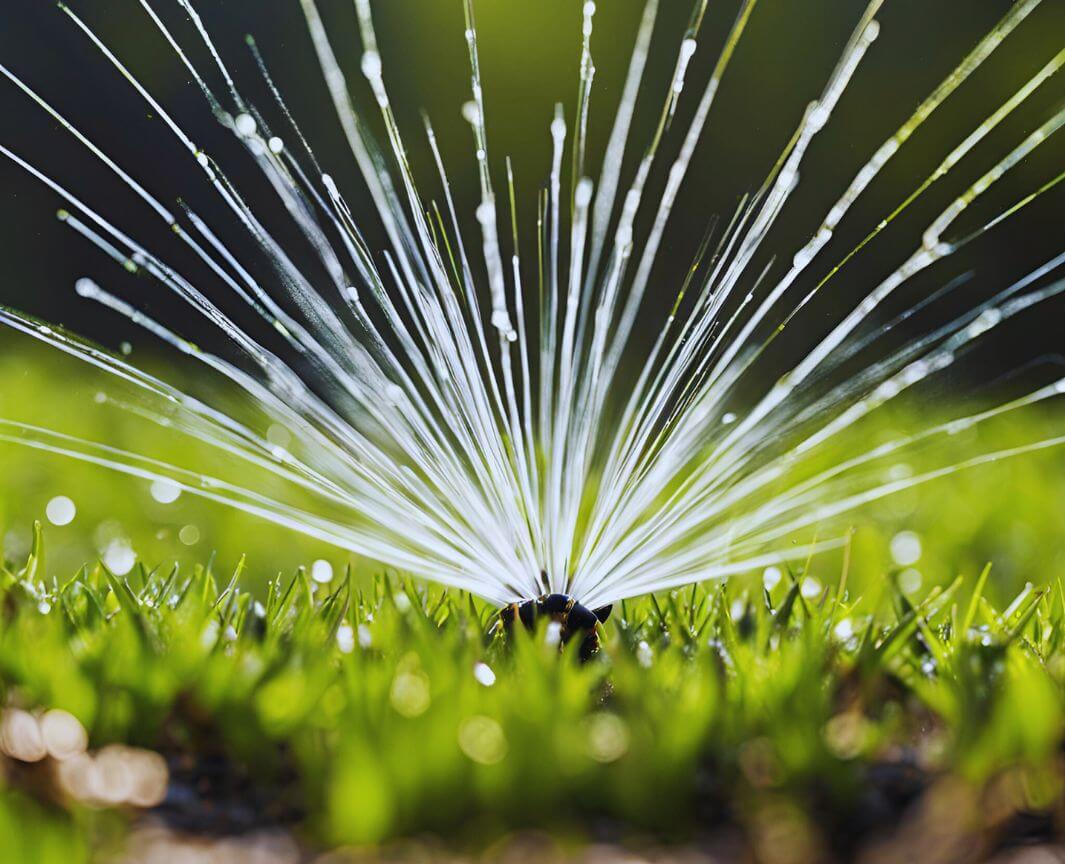
Common Causes of Low Pressure in One Sprinkler Zone
Understanding the common causes of low pressure in one sprinkler zone is essential for effective troubleshooting. Key issues often include improper installation, leaks, clogs, a loose solenoid, or timer problems.
Identifying and addressing these factors can restore peak sprinkler performance.
Improper Installation
Improper installation often manifests as low pressure in one sprinkler zone, commonly stemming from errors such as connecting multiple zones to a single water pressure source or the installation of a defective valve. An installation error can lead to significant issues, primarily low water pressure, affecting the efficiency of your sprinkler system. Such errors may involve the improper installation of zone valves, incorrect routing of water lines, or errors within the valve box by the installer.
When connecting two zones to a single water pressure source, the system may struggle to supply adequate pressure to each zone, resulting in suboptimal performance. Similarly, a faulty valve can restrict water flow, causing low pressure from the outset. If low water pressure has been evident since installation, scrutinizing these areas is important. Checking that each zone valve is correctly installed and that water lines are properly connected can mitigate these issues.
Consulting a professional to review the installation can identify specific problems. They may recommend replacing defective valves or reconfiguring the water supply to ensure each zone operates independently, thereby restoring optimal water pressure. Proper installation is paramount to achieving a fully functional irrigation system.
Leaks
Leaks in the sprinkler zone’s lines or at the nozzles are a common cause of low pressure, often resulting from damaged pipes due to tree roots or accidental yard work damage. When a tree root infiltrates a pipe, it can create cracks and breaks, leading to a leak in the line. Similarly, accidental damage from shovels, lawn aeration, or other yard activities can puncture or crack the system’s pipes, causing water to escape before it reaches the nozzles.
Identifying a leak in the line involves inspecting the area for signs of water bubbling up from the ground or unusually wet soil. If water is visibly pooling or bubbling, it is a significant indication of a leak in that section of the zone’s lines. Additionally, a leak at a nozzle can cause water to spray improperly, reducing pressure in the entire zone.
To resolve these issues, it is essential to locate the exact point of damage. Excavating the affected area may be necessary to repair or replace the damaged pipes.
Regular inspection of the sprinkler system can prevent minor leaks from escalating into more severe problems, ensuring consistent water pressure and effective irrigation.
Clogs
One prevalent cause of low pressure in a sprinkler zone is clogs, often resulting from debris accumulation in the nozzles or a malfunctioning valve. These clogs can greatly impede the water flow, causing a noticeable pressure issue. Sprinkler heads clog due to various types of debris, including dirt, sand, and plant material, which can obstruct the nozzles and reduce the system’s efficiency. Additionally, a broken valve can exacerbate these problems by failing to regulate the water flow properly.
To troubleshoot this issue, inspect each sprinkler head for visible clogs and debris. Cleaning the nozzles with a small wire or brush can often restore normal water pressure. If the clog persists, it may be necessary to disassemble the sprinkler head for a more thorough cleaning or replace it entirely. Addressing these clogs promptly can prevent further complications and maintain excellent irrigation performance.
| Common Clog Sources | Symptoms of Clogs | Solutions |
|---|---|---|
| Dirt and Sand | Low water pressure | Clean nozzles |
| Plant Material | Uneven spray pattern | Replace head |
| Broken Valve | Inconsistent pressure | Replace valve |
Loose Solenoid
A loose solenoid can greatly impact water pressure in a sprinkler zone by causing the valve to remain partially closed, thereby restricting water flow. The solenoid, an electromechanical component, is responsible for controlling the opening and closing of the valve. When the solenoid is not properly connected, it can lead to a malfunction where the valve does not open fully, consequently reducing pressure and resulting in low water flow to the sprinkler heads.
To diagnose this issue, begin by inspecting the solenoid for any signs of looseness or improper connection. Turn off the water supply and electrical power to the sprinkler system before proceeding.
Carefully remove the solenoid and check for debris or wear that could be affecting its connection. Reattach the solenoid, ensuring it is securely and correctly positioned. Tightening the solenoid can often resolve the problem by allowing the valve to open fully and restore normal water pressure.
Timer Problems
Beyond issues with a loose solenoid, timer problems can also lead to low pressure in a specific sprinkler zone, often due to timing errors or malfunctions that disrupt the watering schedule and cycle completion. Timer malfunctions are a frequent culprit behind intermittent low pressure in one zone, where the irrigation system’s performance is compromised by irregular or incomplete watering cycles.
A malfunctioning timer can cause significant issues, such as timer delays that prevent the system from operating at the correct intervals. This can result in the irrigation zone receiving insufficient water pressure, leading to suboptimal watering outcomes.
For instance, an irrigation timer that is behind schedule may fail to open and close valves at the proper times, causing incomplete cycles that directly affect the water distribution efficiency.
To address irrigation system timer problems, it is important to inspect the timer settings regularly and ensure they are correctly programmed. Additionally, replacing a faulty timer can resolve low pressure due to timer malfunctions, restoring the system’s functionality.
Professional inspection and maintenance can preemptively identify and rectify timer-related issues, ensuring consistent and adequate water pressure across all sprinkler zones.
Backflow Preventer Valve Issues
Ensuring that the backflow preventer valves are fully open is essential, as partially closed valves can greatly restrict water flow and lead to low pressure in a specific sprinkler zone. Backflow preventer valve issues often arise when the valve is not fully open, causing a significant water flow restriction. This scenario can be easily overlooked, yet it plays a critical role in maintaining ideal water pressure for your irrigation system.
A backflow preventer valve is designed to protect potable water supplies from contamination or pollution due to backflow. However, if the valve is not fully open, it can inadvertently cause low pressure in the affected sprinkler zone. Technicians should inspect the backflow preventer valve to ensure it is in the correct position. A valve not fully open can act as a bottleneck in the system, restricting water flow and thereby reducing the efficiency of the sprinkler zone.
To address this issue, carefully adjust the backflow preventer valve to the fully open position and verify that water flow has been restored to its intended capacity.
Regular maintenance and inspection of these valves are crucial in preventing water flow restriction and ensuring consistent sprinkler performance.
Pressure Regulation Valve (PRV) Issues
In addition to backflow preventer valve issues, problems with the Pressure Regulation Valve (PRV) can also lead to low pressure in a specific sprinkler zone, necessitating a thorough examination of this component.
A failing PRV can cause significant pressure drops when the system is running, which can be diagnosed by comparing static and dynamic pressure readings. Static pressure refers to the pressure in the system when water is not flowing, while dynamic pressure refers to the pressure when water is actively flowing through the sprinkler system.
PRV issues often stem from wear and tear, debris buildup, or mechanical failure. To accurately diagnose PRV failure, one must first take pressure readings both upstream and downstream of the pressure regulator. If a substantial pressure drop is observed in dynamic conditions compared to static conditions, the pressure regulation valve is likely malfunctioning.
PRV diagnosis involves checking for inconsistencies in pressure readings over time. Should the PRV be found faulty, PRV replacement is often the recommended solution. Replacing a defective pressure regulation valve can restore ideal pressure levels, ensuring efficient operation of the sprinkler zone.
Regular maintenance and timely PRV diagnosis are key in preventing future low-pressure issues.
Municipal Water Supply Issues
Municipal water supply issues, particularly during peak usage periods, can greatly contribute to low pressure in a specific sprinkler zone. When city water systems experience high demand, especially in hot and dry weather, the overall water supply pressure can drop. This reduction in pressure can result in water pressure problems that affect your sprinkler system’s performance.
High usage periods often see a surge in water consumption for activities such as lawn irrigation, filling pools, and household usage, leading to water pressure loss. Municipal water supply issues are typically temporary but can have a substantial impact on the efficiency of your irrigation system.
To diagnose and address these water pressure issues, consider the following:
| Condition | Impact | Solution |
|---|---|---|
| High Usage Periods | Lower pressure in sprinkler zones | Water during off-peak times |
| Hot and Dry Weather | Increased demand on water supply | Adjust watering schedule accordingly |
| Municipal Water Supply | Reduced city water pressure | Contact local water authority |
Improperly Sized Pipes
Properly sizing the pipes in your sprinkler system is essential to maintaining adequate water pressure and ensuring uniform irrigation coverage. The hydraulic principles governing water flow dictate that pipe diameter, flow rate, and friction loss are critical factors.
When water travels through a pipe, it encounters friction between the water and the pipe walls, causing a reduction in pressure. This friction loss is exacerbated by longer pipe lengths and higher flow rates, and it is more pronounced in smaller pipes.
Improperly sized pipes can lead to significant pressure reduction within a sprinkler zone. If the pipes are too small, they cannot deliver the required flow rate to the sprinkler heads, resulting in low water pressure. This often manifests as uneven watering, where some areas receive insufficient water while others may be overwatered.
Additionally, smaller pipes cause higher water velocities, which in turn increase friction losses and further reduce pressure.
To avoid these issues, it is essential to adhere to proper pipe sizing guidelines, taking into account the specific hydraulic principles and the desired flow rates for your sprinkler system. Ensuring correctly sized pipes will optimize water pressure and provide consistent irrigation coverage.
Pressure Regulators
Diagnosing issues related to pressure regulators is essential for maintaining consistent water pressure within a sprinkler zone. Pressure regulators are designed to guarantee water pressure consistency; however, their finite lifespan means they are susceptible to wear and tear. Over time, a pressure regulator failure can lead to significant water pressure fluctuations, causing inadequate water flow to the sprinkler heads.
Water flow fluctuations resulting from pressure regulation issues can manifest as irrigation coverage issues, such as dry spots on the lawn or uneven watering patterns. These symptoms indicate that the pressure regulator is no longer effectively managing the water pressure, leading to low pressure in the sprinkler zone.
To address these issues, it is vital to perform regular pressure regulator maintenance. Inspecting the regulator for signs of wear and replacing it when necessary can mitigate water pressure fluctuations and maintain ideal irrigation coverage.
Understanding the pressure regulator lifespan and proactively managing its condition can prevent unexpected pressure regulator failure, ensuring that water pressure consistency is upheld.
Diagnostic Steps
To effectively diagnose low pressure in a single sprinkler zone, begin by conducting pressure tests to identify any deficiencies within the system.
Follow this with a thorough visual inspection to check for any visible leaks or blockages.
Additionally, confirm proper function by examining the valves and solenoids, backflow preventer valves, and performing precise flow measurements.
Pressure Tests
Conducting pressure tests is essential to diagnose the cause of low pressure in a sprinkler zone effectively. By measuring both static and dynamic pressures, one can identify potential issues such as a PRV issue, a leak, or other factors causing pressure drops.
- Attach a Pressure Gauge: Begin by attaching a pressure gauge to the hose bib nearest to the sprinkler system. This will be used to measure the static pressure when the system is off and the dynamic pressure when it is running.
- Measure Static Pressure: With the sprinkler system turned off, record the static pressure. This value represents the baseline water pressure available to the system.
- Run the Problematic Zone: Activate the sprinkler zone experiencing low pressure and observe the pressure gauge to measure the dynamic pressure. This reading shows the pressure when water is actively flowing through the system.
- Compare Pressures: Analyze the difference between static and dynamic pressures. A significant pressure drop indicates a potential PRV issue or a leak in the system.
Visual Inspection
Begin the visual inspection by meticulously examining the sprinkler zone for any visible signs of leaks, such as excessively wet areas or water bubbling from the ground. These indicators can pinpoint the precise location where water is being lost, contributing to low pressure within one sprinkler zone.
Carefully observe the sprinkler heads, as they are common culprits for reduced performance. Check each head for clogs, which could impede water flow, and assess for any physical damage that might affect their functionality. A clogged or damaged sprinkler head can greatly disrupt the water distribution, leading to uneven watering and pressure issues across the zone.
In addition to the sprinkler heads, inspect the connecting pipes and fittings. Look for any cracks or breaks which could cause leaks. Even small fissures can result in substantial water loss over time, exacerbating low pressure problems. Pay close attention to junction points where pipes meet, as these areas are particularly susceptible to leaks.
Valve and Solenoid Check
Ensuring essential valve and solenoid functionality is crucial for diagnosing and resolving low pressure issues in one sprinkler zone. A meticulous approach to valve and solenoid checks can identify underlying issues that may impede ideal water flow.
Here are the diagnostic steps to follow:
- Manual Operation of Valves: Manually operate the valves to confirm they open fully. This step helps ascertain if there is any mechanical obstruction or partial blockage within the valve.
- Valve Check: Conduct a thorough valve check to ensure it is not clogged or damaged. An obstructed valve can greatly reduce water pressure in the sprinkler zone.
- Solenoid Connection: Inspect the solenoid connection for proper attachment. Ensure the electrical connections are secure and free from corrosion, as loose or corroded connections can impair solenoid functionality.
- Solenoid Functionality: Test the solenoid for proper functionality. Use a multimeter to verify if the solenoid is receiving the correct voltage and is capable of actuating the valve. A faulty solenoid can prevent the valve from operating correctly, leading to reduced pressure.
Backflow Preventer Valves
After thoroughly inspecting the valves and solenoids, the next diagnostic step involves examining the backflow preventer valves to make sure they are fully open for best water flow. Begin with a detailed backflow preventer inspection, focusing on the valve handles position. Make sure the handles are parallel to the pipes, as this indicates they are in the open position. If the handles are not parallel, adjust them accordingly.
Backflow preventer troubleshooting often reveals that partially closed or misaligned valves can greatly restrict water flow, causing low pressure in the sprinkler zone. Regular backflow preventer maintenance is essential; check for any signs of wear, corrosion, or mechanical failure that could impede functionality.
When conducting backflow preventer repair, ensure all components are free of debris and securely fitted. Valve maintenance should include lubricating moving parts and replacing any worn-out seals or gaskets. If backflow preventer issues persist despite these measures, consider consulting a professional for a more thorough evaluation.
Properly maintained and fully open backflow preventer valves are vital for best water flow and pressure in your sprinkler system.
Flow Measurement
To accurately diagnose low pressure issues in a sprinkler zone, measure the water flow at the meter while the affected zone is operational and compare it with the flow rates of other zones. This water flow measurement will help identify any flow rate discrepancies that might be causing the issue.
Here are the diagnostic steps to follow:
- Initiate Zone Flow Comparison: Activate the affected sprinkler zone and record the water flow rate at the water meter. Verify that the measurement accurately reflects the actual flow rate during typical operation.
- Measure Other Zones: Sequentially activate other sprinkler zones and measure their respective flow rates using the same water meter. This flow rate comparison will assist in identifying any anomalies.
- Analyze Flow Rate Discrepancies: Compare the flow rates of the affected zone with those of the other zones. Significant differences may indicate issues such as leaks or pressure restrictions impacting the irrigation system flow.
- Conduct Leak Detection: If the flow rate in the problematic zone is substantially lower, investigate for potential leaks or blockages. Use water flow analysis to pinpoint the exact location and cause of the issue.
Solutions
Addressing low pressure in one sprinkler zone involves several targeted solutions. These include:
- Fixing leaks
- Clearing clogs
- Adjusting or replacing valves
- Checking and adjusting the timer settings
If these measures do not resolve the issue, seeking professional help may be necessary.
Fix Leaks
Identifying and fixing leaks in your sprinkler system often necessitates excavating the affected area to access and repair or replace damaged pipes and nozzles. Addressing water leaks is important for maintaining peak irrigation system performance.
Here are the steps to effectively manage this issue:
- Leak Detection: Start with a thorough inspection to identify potential irrigation system leaks. Check for signs of irrigation pipes leak, such as wet spots or unusually lush areas in your lawn.
- Pipe Inspection: Once a leak is suspected, carefully inspect the pipes. Look for any damaged pipes or connections that may be causing the issue.
- Pipe Repair: If an irrigation pipes leak or sprinkler heads leak is found, proceed with the necessary repairs. This may involve replacing sections of damaged pipes or using pipe repair kits to seal minor leaks.
- Nozzle Replacement: Examine the sprinkler heads. If the nozzles are damaged or clogged, replace them to ensure efficient water distribution.
Regular irrigation system maintenance, including periodic inspections and timely repairs, can prevent leaks from escalating and ensure your sprinkler system operates at peak efficiency. Employing these steps will help maintain consistent water pressure across all sprinkler zones.
Clear Clogs
Clearing clogs in your sprinkler system involves meticulously cleaning out debris from nozzles and valves to restore peak water flow. Efficient sprinkler heads cleaning is essential to remove any accumulated particles that could obstruct water discharge. Begin by inspecting the sprinkler heads for blockages. Carefully detach the nozzles and flush out any debris using water or a small brush.
For a thorough irrigation troubleshooting process, also examine the irrigation pipes. Any buildup within these pipes can greatly impede the flow. Employing a pipe-cleaning tool can be effective in dislodging and removing these obstructions.
Sprinkler maintenance should include regular checks of the sprinkler valves. These valves can accumulate contaminants that impair their functionality. Disassemble the valves and clean them thoroughly, ensuring all moving parts are free of debris. During this process, assess the solenoid; solenoid replacement might be necessary if it shows signs of wear or damage.
Additionally, perform a sprinkler heads inspection to identify and replace any damaged or worn components.
Proper water pressure regulator adjustment is critical to maintaining top water flow. Consistent maintenance and troubleshooting will help sustain the efficiency and effectiveness of your irrigation system, ensuring uniform water distribution across all zones.
Adjust or Replace Valves
After confirming that all clogs are cleared, the next step involves checking and adjusting the valves to maintain ideal water pressure in the affected sprinkler zone. The correct functioning of valves is essential for consistent water flow and pressure.
Here’s a step-by-step guide to address valve-related issues:
- Inspect Valve Positions: Make sure all valves, including the backflow preventer and main water valves, are fully open. Partial openings can cause significant irrigation system pressure drop.
- Perform Water Pressure Adjustment: Check the water pressure regulator for any issues. Adjust the regulator to the appropriate setting if the sprinkler heads are experiencing pressure issues.
- Valve Replacement: If a valve is faulty or damaged, replace it immediately. Replacing the valve can resolve water pressure troubleshooting and restore optimal pressure levels.
- Regular Maintenance: Conduct routine water pressure regulator maintenance to ensure they remain in good working condition. Regular inspections can preemptively address potential problems before they escalate.
Check and Adjust Timer
Confirming that the timer is accurately set and functioning properly is crucial for maintaining ideal water pressure in the sprinkler zone. The irrigation timer, responsible for regulating water distribution, must have its timer settings correctly programmed to avoid pressure inconsistencies.
Begin by checking the timer functionality to verify it is operating as intended. Malfunctioning timers can lead to inadequate water flow, requiring immediate attention.
Adjust the timer to guarantee the programmed settings align with the specific watering needs of the zone. Incorrect timer settings can result in either over- or under-watering, both of which can negatively impact pressure.
Conduct thorough timer troubleshooting to identify any discrepancies or faults. If the timer is found to be defective, replace the timer promptly to restore optimal function.
Setting the timer correctly involves ensuring the start times, duration, and frequency are suitable for the sprinkler zone’s requirements. This precision in adjustment is crucial to maintaining consistent water pressure.
In cases where the timer replacement is required, select a high-quality irrigation timer that offers reliability and ease of programming. By carefully managing the timer settings, you can effectively address and prevent low-pressure issues in your sprinkler system.
Professional Help
Should the timer adjustments fail to resolve the low-pressure issue in the sprinkler zone, it may be time to consult a professional for a thorough diagnosis and specialized repair. Hiring a professional can be particularly advantageous in addressing complex issues such as PRV failures or extensive leaks that may be beyond the scope of typical DIY troubleshooting.
Engaging professional help guarantees that potential irrigation system issues are accurately diagnosed and effectively resolved.
Here are four key reasons to contemplate hiring a professional for sprinkler repair:
- Expert Diagnosis: Professionals possess the technical expertise required to identify the root causes of low pressure, including complex issues like malfunctioning Pressure Reducing Valves (PRVs) and extensive leaks.
- Efficient Repairs: With specialized tools and experience, professionals can conduct repairs more swiftly and accurately, minimizing downtime and preventing further damage.
- Preventative Measures: Professionals can offer insights into preventative maintenance, ensuring the longevity and efficiency of your irrigation system.
- Warranty and Assurance: Hiring a licensed professional often includes warranties on labor and parts, providing peace of mind and assurance that the problem will be fixed correctly.
How Do I Know if My Backflow Preventer Valve Is Faulty?
Identifying a faulty backflow preventer valve requires careful observation of specific signs and the execution of targeted diagnostic tests. Several indicators can signal a malfunctioning valve. Common signs include water leaks around the backflow preventer valve, which may result from worn-out rubber parts, corrosion, or debris. Discolored water, cloudy appearance, or an unusual taste or smell can also indicate the valve is allowing contaminants into the water supply. Additionally, low water pressure throughout your system, slow drainage in fixtures, and unusual noises such as hissing or gurgling from the valve suggest internal issues.
Testing the backflow preventer valve involves a series of methodical steps. Begin with a visual inspection to check for leaks and corrosion. Next, perform pressure tests by measuring both static and dynamic pressure. A significant drop in pressure can be a sign of a faulty valve. Functional tests include shutting off the water supply and using a differential pressure gauge to test the check valves and relief valve.
For precise diagnostics, professional assistance is often necessary. Certified professionals can conduct detailed tests and guarantee compliance with local regulations. Regular maintenance and annual testing can help identify and rectify issues before they become significant problems.
How Can I Tell if a Leak Is Causing Low Pressure in My Sprinkler Zone?
Determining whether a leak is causing low pressure in your sprinkler zone requires systematic inspection and diagnostic testing to identify and address the issue efficiently. Begin by conducting a visual inspection of your irrigation system:
Visual Inspection
• Check for Wet Spots: Look for unusually wet areas along the sprinkler lines.
• Inspect Sprinkler Heads: Identify any irregular water patterns from the sprinkler nozzles.
• Look for Water Bubbling: Identify significant leaks indicated by water bubbling up from the ground.
Next, proceed with pressure testing to confirm any suspicions:
Pressure Testing
• Attach a Pressure Gauge: Connect it to an outdoor faucet or test valve.
• Pressurize the System: Monitor for significant pressure drops, indicating leaks.
• Isolate Each Zone: Activate zones individually to pinpoint the affected area.
Perform functional tests to assess the operation of each zone:
Functional Tests
• Turn on Each Zone Individually: Observe for water spurting or sprinklers not fully extending.
• Check for Low Pressure: Verify head-to-head coverage; diminished coverage suggests a leak near the zone’s start.
Lastly, consider advanced leak detection methods for thorough examination:
Advanced Leak Detection Methods
• Use Leak Detection Devices: Employ acoustic detectors or thermal imaging.
• Dye Testing: Add dye to trace water flow and identify leaks.
Through these systematic steps, you can effectively diagnose and address low water pressure caused by leaks in your irrigation system.
Are There Any Other Causes of Low Pressure in My Sprinkler System Besides the Ones Listed?
Beyond leaks, several other factors can cause low pressure in your sprinkler system, necessitating a thorough evaluation to guarantee peak performance. One common issue is a malfunctioning water pressure regulator. If the regulator is not properly set or is failing, it can restrict water flow, leading to inadequate pressure in one sprinkler or even across the entire system.
Electrical issues, such as faulty solenoids or timers, can also affect system performance by preventing valves from opening fully. Additionally, water source issues may arise, especially if you rely on well water. A failing pump or low water levels can hinder adequate pressure.
Municipal water supply issues, including maintenance work or regulatory changes, can similarly impact your system. Obstructions in the main line, such as debris or mineral buildup, can further restrict water flow.
System design flaws, such as improper zoning or pipe sizing, can cause uneven pressure distribution. Aging infrastructure, including corroded pipes and worn-out components, often results in diminished system efficiency.
What Is the Best Way to Identify a Leak or Break in a Water Line?
To accurately pinpoint a leak or break in a water line, employing a combination of visual, auditory, and advanced detection methods is essential. These strategies not only enhance accuracy but also expedite the repair process, minimizing potential damage and water waste.
Visual and Auditory Inspection
Visual Inspection: Look for puddles, wet spots, discolored water, mold, or cracks in the foundation. These signs can indicate a water line leak.
Auditory Signs: Listen for hissing, whistling, or bubbling sounds in the pipes. Running water sounds when no fixtures are in use can also signal a hidden leak.
Meter and Pressure Tests
Meter Test: Turn off all water in the house and check the water meter. If it continues to move, there’s likely a leak.
Pressure Test: Measure water pressure with all faucets off. A significant drop can indicate a leak.
Advanced Detection Methods
Acoustic Leak Detection: Use listening devices or leak noise correlation to detect leaks through walls, floors, and underground.
Thermal Imaging: Employ thermal cameras to find temperature differences caused by leaks.
Trace Gas Detection: Pressurize pipes with non-toxic gas and use a gas detector to locate leaks.
Video Pipe Inspection: Insert a high-resolution camera into the pipes to visually inspect for leaks.
Ground Penetrating Radar: Use radar waves to detect underground anomalies.
How Often Should I Clean or Replace My Sprinkler Heads?
Regular cleaning and replacement of sprinkler heads are essential to maintain peak performance and guarantee longevity of your irrigation or fire protection system. The recommended frequency for cleaning lawn sprinkler heads is once or twice a year, ideally during the spring and fall seasons. This practice ensures even water distribution and prevents clogging, which can lead to sprinkler heads low pressure.
Fire sprinkler heads, on the other hand, should be cleaned regularly using compressed air or a vacuum to avoid accidental activation. For both types of systems, it is vital to measure water pressure to identify any discrepancies. A sprinkler heads pressure drop may indicate clogging or damage, necessitating immediate attention.
Regular inspection can help in detecting irrigation system water leaks, which can impact the overall water pressure measurement. Sprinkler heads replacement should be performed as needed. Lawn sprinkler heads typically require replacement when they are damaged, leaking, or malfunctioning.
Fire sprinkler heads generally have a replacement interval based on age, visible damage, or system modifications. Ensuring proper water pressure regulator settings and conducting periodic water pressure regulator repair can prevent significant issues in your irrigation system water supply.
Can I Adjust the Pressure Regulator on My Own or Do I Need to Call a Professional?
Adjusting the pressure regulator on your irrigation system can be a manageable task for homeowners with basic plumbing knowledge and the right tools. Proper pressure regulator adjustment is essential for maintaining ideal water flow and preventing low pressure in one zone.
Here are the steps you can follow:
- Locate the Pressure Regulator: Typically found near the main water line or sprinkler control valves, the pressure regulator is often bell-shaped.
- Measure Current Water Pressure: Use a pressure gauge on a hose spigot to get an accurate reading of the existing water pressure.
- Relieve System Pressure: Turn off the main water supply and open a faucet to relieve any residual pressure in the system before making adjustments.
- Adjust the Pressure: Turn the adjustment screw clockwise to increase pressure or counterclockwise to decrease it. Make small, incremental adjustments and secure the setting by re-tightening the locknut.
For more complex irrigation system maintenance or if you encounter persistent issues, professional assistance is recommended. Professionals can expertly handle pressure regulator troubleshooting, diagnosing water pressure issues, and performing pressure regulator replacement if necessary.
Incorrect adjustments can lead to further irrigation system repair needs, making professional intervention a prudent choice for ensuring effective water pressure adjustment.
What Are the Signs of a Clog in a Sprinkler System?
Identifying a clog in a sprinkler system is crucial for maintaining peak irrigation performance and preventing water wastage. Signs of a clog can manifest in various ways, affecting the irrigation system water flow and efficiency.
A primary indicator of a clog is low water pressure, which may be observed through reduced sprinkler heads water flow. This low pressure often results in uneven watering, leaving dry and overly wet spots on your lawn. Clogged sprinkler heads also exhibit irregular spray patterns, sputtering or spurting instead of delivering a consistent stream.
Another sign is when sprinkler heads malfunction by failing to pop up or retract properly, often due to accumulated dirt or debris. Visible debris in the screens or nozzles is a clear sign of a clog and warrants immediate cleaning. Persistent pooling or puddling of water around sprinkler heads or along irrigation lines can indicate blocked flow.
Additionally, increased water bills without a corresponding increase in irrigation usage can be a subtle sign of a clog, as the system may use more water to compensate for the blockage.
Recognizing these signs and addressing clogs promptly can ensure effective water pressure regulator troubleshooting and optimal irrigation system performance.
How Do I Check if My Solenoid Is Loose?
To determine if your sprinkler system’s solenoid is loose, follow these thorough steps for a detailed inspection and adjustment.
- Turn Off the Water Supply Make sure the main water supply to your irrigation system is turned off to prevent accidental water flow during the inspection.
- Locate the Solenoid Find the solenoid, a cylindrical device with wires, typically situated in the valve box. This is essential for identifying any issues.
- Inspect the Solenoid Conduct a visual inspection for any signs of damage, such as cracks or corrosion. Gently attempt to turn the solenoid by hand; it should be snug but not overly tight. If it turns easily, it may be too loose.
- Tighten the Solenoid If the solenoid is loose, turn it clockwise by hand until it is secure. Avoid overtightening to prevent damage to the valve or solenoid.
Activate the sprinkler system to make sure proper operation. Listen for a click or buzz indicating the solenoid is functioning correctly.
For further validation, use a multimeter to check the resistance. A low resistance value confirms the solenoid’s integrity.
Reattach any disconnected wires securely, then run a full cycle to confirm everything is working correctly.
If issues persist or the solenoid appears damaged, consulting a professional may be necessary.

I’m Carlos Robert, a passionate gardener, and blogger. With years of experience and knowledge in the field of garden watering, I have created a blog to share my insights and tips on the topic. I strive to provide readers with detailed information about all aspects of sprinkler systems, from garden sprinklers to fire sprinklers, along with nozzles, hoses, and other related products. I love helping my readers create the perfect garden with their ideal setup!